29 July, 2010

Front French Braid

Just a simple idea for today (excuse the sloppy-ness, I was in a hurry the day I took this):
Some people call this the Lauren Conrad braid, or Braided Bangs... whatever you want to call it, I think its a really sweet style. I wear it AT LEAST once a week! It looks good on straight, wavy or curled hair. Tightening or loosening the braid also gives you variety with the style. An inside out, or dutch braid is also really nice for this style. I love this style for summer because its so laid back and easy, plus it just makes me think of the beach for some reason.

I also like this one because it looks like and works as a headband, but you don't actually have to use a headband! Because this style is so simple I didn't include a tutorial, but if anyone wants that, just leave a comment.

Does anyone else over-use this style? Or, what is your favorite simple summer style?

21 July, 2010

Wrap Around French Braid Variations 3 & 4

So remember this hairstyle? And these variations? Here are two more variations, as promised.

#3: Dress it up with a hair wrapped pony. To do this, finish your braid in a simple ponytail. Then take a sections of your longer hairs and wrap them around the ponytail. You can secure them with bobby pins after, or a clear elastic, or use a topsy tail to pull the ends back into the ponytail.


To change this look up a little more, you can even continue a simple braid part way down the hair, then so the wrapping.

#4: Use the tail to create a messy bun:
Here it is from the back (ish):

Remember that you can do any of these styles on wet hair for a neater, tighter look.

Has anyone tried any of these styles yet? Which variation is your favorite so far?

18 July, 2010

Look What I Made!!

Just what is that you ask? Well my dear friends, that there is the adorable ribbon bow headband I have been lusting after for a year! I have no scientific research on this one, but I feel this style of headband was made popular by Blair on the show Gossip Girl, at least that's where I got addicted. Normally the bow is attached to a hard, pre-formed headband, which is really cute, but those darn headbands never fit on my tiny head!! (I have an abnormally small and misshapen head). So I finally gave up on purchasing a bow headband and decided to make my own, I am very pleased with the result!

To make your own you will need ribbon, in your choice of colour and width. I chose a neutral brown, in 6/8 an inch. If you are making this for yourself, I wouldn't go much wider, but if you are making a headband for a little one you could go a little thicker. But to each their own!

Cut three pieces of ribbon, the middle one shown here is your most important piece. It should be roughly 6 inches long. Then cut a piece about an inch and a half longer and one a tad bit smaller (my longest piece here is a too long...)

Take that 6 inch piece and use a glue gun to make it into a loop. Then , using more glue, press your loop in half, creating an 8 shape.

Okay, now you need to put a small strip of glue horizontally over your seam and squish the two edges up and together:
You are done the main part of your bow. 
Next step is to take the largest piece you cut and make a loop with it. Then flatten that loop like you did with the first one. You do not need to squish this on together though. Here is what you should have now: (only your second loop will be slightly smaller than mine!!)
 Glue your bow on top of your larger loop. It is up to you as to which side of the bow you face up. I like the folded side up, but the creased side is cute too.(excuse the blurry photo, my camera has a mind of its own)
Now take your small piece of ribbon and glue it to the back of your two layer bow. It will form a T like shown:
 
Wrap that ribbon around twice to cover the front. 
If you want this attached to a fourth piece of ribbon, to create the headband like I did, in your second wrap, take the middle ribbon over the headband ribbon as well (not shown here), this will keep your bow in place. Glue your anchor piece on the back. If you want to attack this bow to a plastic headband, ponytail holder, or a clip of some kind, just do the two wraps and glue it in the back. You will have this:

Cute right? You can use hot glue to attach it to the accessory of your choice.

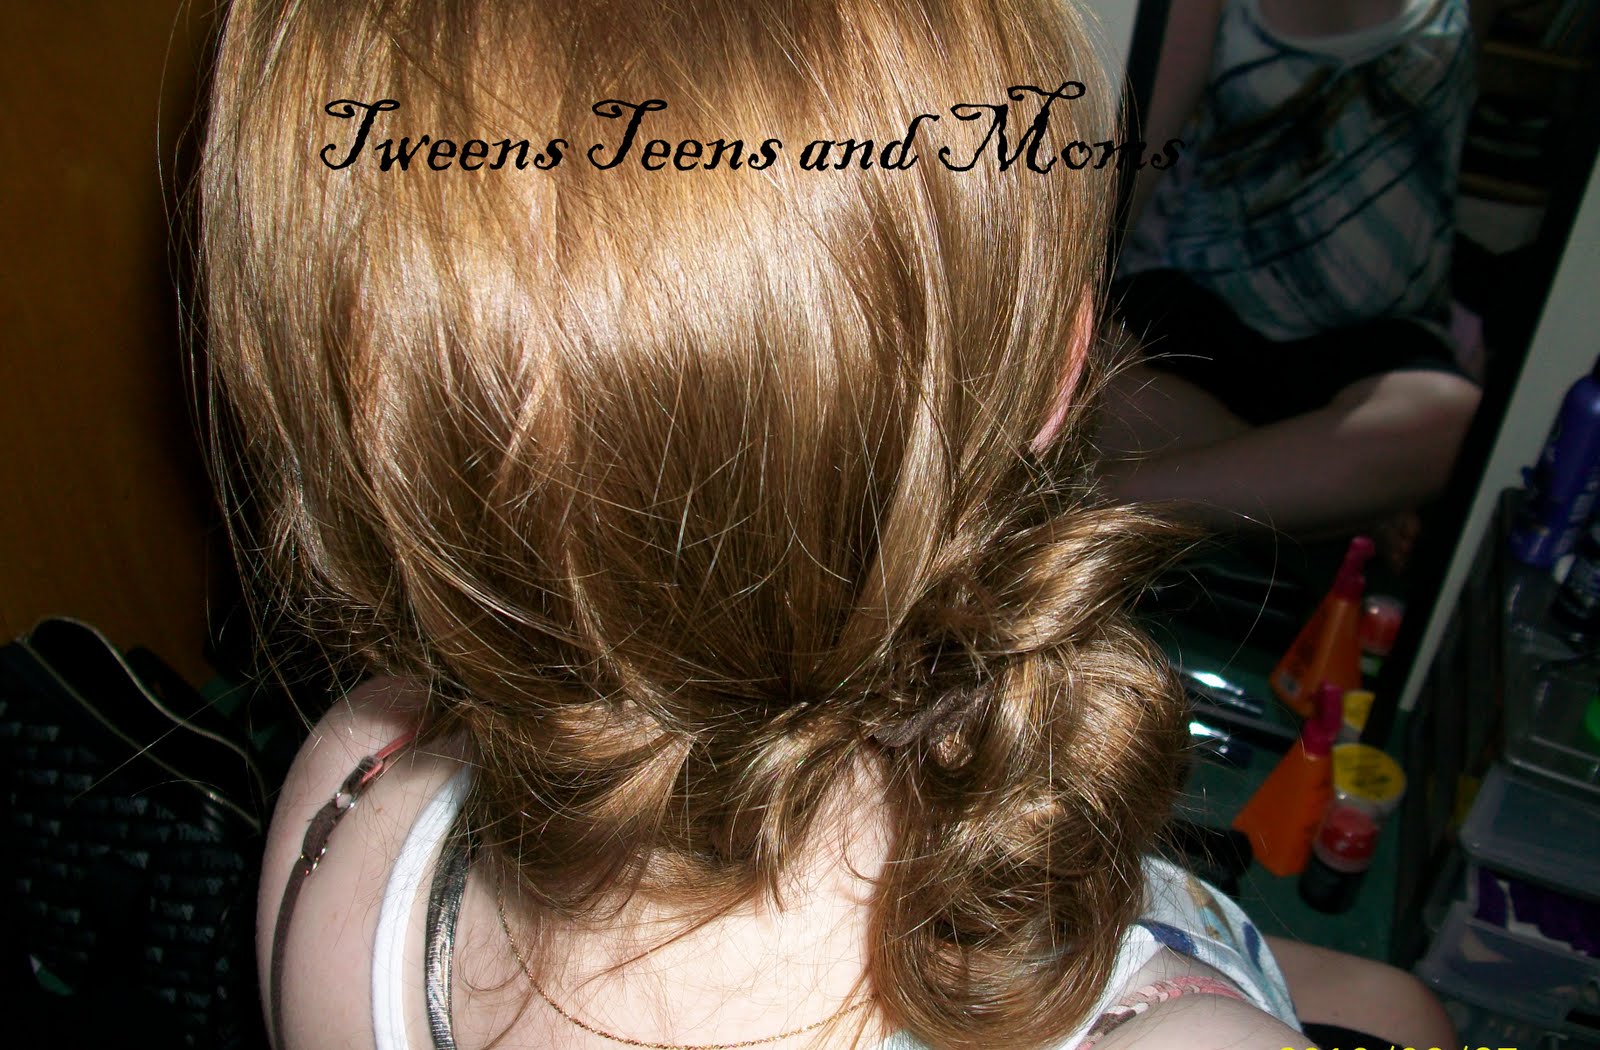
And here is me, sporting my new headband! I love it!

16 July, 2010

Hair Spray

Just thought I'd let you all know, I use way to much hairspray. I probably should have grown up in the 80's, I think I'd fit in.... I don't know, maybe it comes from my years of dancing or somthing, but I just like everything plastered smoothed into place (even if that place is messy and loose, I don't like things moving halfway through the day).  It's gross but I probably spray a continuous mist for at least thirty seconds everyday (gags most people, but I don't mind)!

For years I have been using TRESemme hairspray. It's really affordable and works like a charm. They even have an Ultra Fine Mist formula, which is a great idea if, like me, your going to overuse the product. At least that way it doesn't get all globby and thick looking. However, for like a month I have been noticing a ton of build up on my hair, and not the white flaky kind that you would expect. Basically, even after a good washing, the shaft of my hair feels sticky and coated (so bizarre). I know, I know, your probably thinking "just don't use so stinking much hairspray!" Well I really don't think this is the problem, Ive been using the same product and amount for at least four years straight and I am just now having problems.

Of course clarifying shampoos and such work just fine to get rid of the build up, but they are hard on my hair and I really cant use them comfortably more than once, SOMETIMES twice, a month.

I haven't noticed any difference in the performance of the hairspray, still holds everything just the way I want it! So I'm wondering, is it possible that my hair has just become used to the product? Or did they maybe change the formula, hence the new build up?? ...I'm so confused.

Anyway, I bought new hairspray, Herbal Essences Tousle Me Softly. Totally works just as good as my usual (although I do miss the aersole bottle....)  and best part: NO GUNKY BUILDUP!

So that's my story for today.

Has anyone else ever had a similar experience? What type of hairspray do you use?

Beads, Braids & Beyond's GiveAway

Nikki over at Beads Braids and Beyond is celebrating the fact that she now has 1000 followers! Isn't that exciting? As part of her celebration she is having some pretty amazing giveaways, one of which is for Curlformers!! These look like the most amazing curlers ever and I have really wanted a set for a LONG time but I cant justify buying them on my starving student budget. So I am hoping my luck will turn out and maybe I can win this giveaway!!! (by creating this post I get an extra entry ;) ). So to anyone reading this, go check out Nikki's blog, she is very talented and does a WONDERFUL job caring for her DD's hair. But, don't enter the giveaway, cuz then I get less chances of winning those bad boys (jk) !

08 July, 2010

Punk'ed Up Pony

The punk-ish, rocker look is really in right now. I don't think this look really suits me, but it was totally fun sporting this do for a day, and I think it looks really great on a lot of girls. 
 
To do this one you are gonna need straight, straight, straight hair! Flat iron till your satisfied. 
Now section your hair off from ear to ear across the crown. Secure the top half out of the way.
 Now take about half of the remaining hair and tie it off in high, tight ponytail. Make sure that bad boy is high up on your head. I like to use the clear Ouchless elastics because they are easier to hide, but any type will do.
Then take the bottom half  and comb it up and add it into the original ponytail. By using this two step process, your ponytail will end up appearing fuller (exactly the look you are going for here).

Now unclip the front half of your hair. Section out the middle chunk of your hair (the bang section), clip the side two pieces out of your way. Now back comb and spray the junk outta your bangs.  
 
Use a rat tail comb to smooth this bit back and pin into place. X-ing your bobby pins will give you better hold.
Then release one of your side sections, spray it then rake it up and over your pumped up bangs. Use a bobby pin X to hold it in place. Repeat on the other side. Adjust the tails of all three pieces to cover your ponytail.
At this point, you can rat up the tails from your front half of hair to cover your ponytail holder better. For extra poof, rat up the ponytail some too. Add spray and you’re done!
Here's the look from the side: 
 And the front (I really think the eyeliner enhanced the look haha!)

03 July, 2010

Wrap Around French Braid Variations 1&2

Remember how I said I have a bunch of ways to switch up the Wrap Around French Braid? Well today I will post two new alternatives for you. If you are not sure how to do the braid check here.

Ok, option 1: Dont finish in a braid, do a simple pony tail instead:

Option 2: spice up that pony tail by creating a topsy tail (pull through, knot, flip, whatever you call it). If you have the tool you are set. If not, simply reach thumb and pointer finger up hair behind a loosened ponytail, grap the ponytail and pull it down behind itself, then tighten everything up.
This variation is especially helpful if the braid gets a little messy in the front because it kinda hides everything.;)

I know these are both just simple side ponytail ideas, but with the french braid running across that back of your head it really dresses it up. Trust me, people will compliment it!

What's your favorite versitile style?