I love this blog! I love taking the pictures, sorting through them, and cropping them. I love writing my super long-winded and more often than not super confusing tutorials. And I love reading the few comments I do receive. It all makes me very happy.
But it takes a lot of time!
As most of you do not know me I will tell you a little bit about me. I am a fourth year education student. I take school very seriously. I think teaching is one of the most important job and therefore I work hard to learn as much as I can so I can do it right. Currently I am in my final teaching practicum. This means essentially I am a full-time teacher and a full-time student simultaneously. I am having a blast and learning a lot!
But it takes a lot of time!
You may see a trend here...
Now I am fool. I knew this was coming. So I pre-shot a bunch of hairstyles. Then the SD card reader on my computer stopped working. So I waited for my students loan to come through . And when it did,because blogging brings me joy and pictures are essential to the blog, I used some of that money (against my better judgment) to remedy this problem (it was only 20$ no big deal, just made me feel a little guilty).
Then I created a few post-dated posts to save me some time when I knew I would be busy.
Then other bloggers, who are on their A game, would beat me to posting these hairstyles, or I would find similar hairstyles on blogs already. This saddened me, but I say to myself its no big deal, its just hair, there is no copyright infringement on hairstyles.
But I must remember I am a newbie, the new kid on the block, the little one who is trying to entice people to check me out. I know they will not check me out if I do not post original content! While I know some readers would not care, in fact some may even enjoy reading/seeing someone else's take on a style. I also know there are some people out there that would hate this. They would make a stink about me "copying" ideas, or "stealing" content. And there are also people out there who would not bother to put up such a stink but just down right don't care to read the same thing twice, and such would stop checking back because I would be nothing but a bore to them. So I have chosen to currently not post anything.
I do not have time to think up new ideas right now, or take new pictures, or edit said pictures. So I am on hiatus. I was discouraged and ready to throw in the towel completely, but I re-considered because after all, I am doing this for myself more than anyone else and I do enjoy it. I just don't have time right now. So hopefully in December, at which time I graduate(!!!), I will once again have enough time to create new ideas and re-invent old ones. Also, hopefully by then enough time will have passed that no one will care if I have a few repeat styles.
So long for now,
farewell is the line.
Ill see you again,
and all shall be fine!
03 October, 2010
11 September, 2010
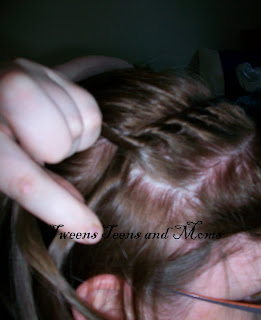
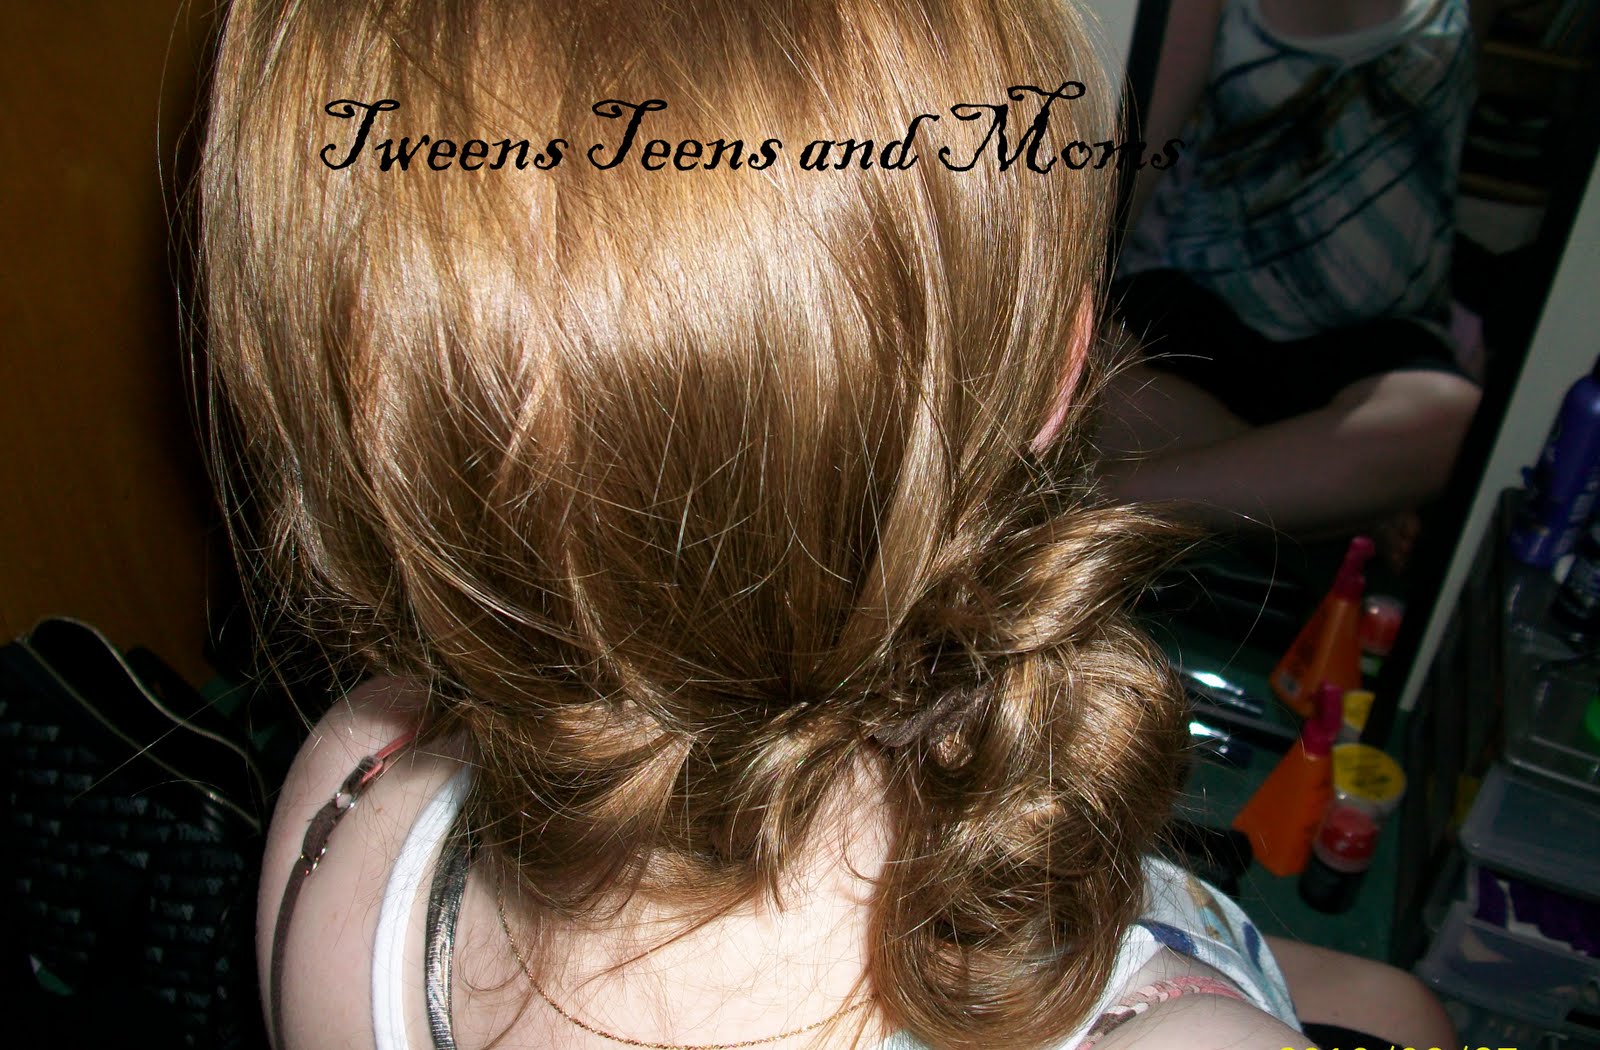
Side Swipe Dutch Braid with Ribbon
I always see these beautiful ribbon style on other hair blogs, but they are just too cutesy for me to wear. This was my compromise (sorry there are no step by step pictures but its easy, I swear!)
I started by making a Dutch Braid (if anyone needs a tutorial on this let me know) but instead of going straight down the head, I made it slant to one side.
Now you will need a piece of ribbon at least twice the length of your braid. Starting at the first plait of the braid, tuck one end of the ribbon into the hair and bobby pin it in
Now thread the other end of the ribbon into a plastic craft need
(a safety pin will work too, or if you are patient and gentle you can just use your fingers to weave the ribbon through). Now following one strand of your braid, weave your ribbon through the braid. Do this one plait at a time or your ribbon will tangle up on your. Also don't pull too hard or you will unpin the ribbon at the top.
 At the end of the braid I used tiny clear elastics to make a little bow. You could also just wrap the elastic with the ribbon, or trim off the extra ribbon.
That's all!
Do you think its too cutesy? Would you wear this style?
 |
| I seriously needed to colour my hair at this point.. Don't judge me I was busy with school! |
Now you will need a piece of ribbon at least twice the length of your braid. Starting at the first plait of the braid, tuck one end of the ribbon into the hair and bobby pin it in
 |
| follow the arrow |
 |
| I got a two pack of these at Walmart for 1$ |
(a safety pin will work too, or if you are patient and gentle you can just use your fingers to weave the ribbon through). Now following one strand of your braid, weave your ribbon through the braid. Do this one plait at a time or your ribbon will tangle up on your. Also don't pull too hard or you will unpin the ribbon at the top.

 |
| Not that you care, but I cannot believe how much my hair has grown since this picture (May) |
Do you think its too cutesy? Would you wear this style?
08 September, 2010
Works for Me Wednesday
Hairstyles are a TON of fun, but I also think hair care, products and the like are really interesting. Therefore, I figured it would be fun to start a series of posts with different tips, techniques, and product reviews to address these things. I have no experience with any hair but my own so anything I post will just be my own ideas/thoughts, I am not really into the science of it all, thus the title: "Works for my Wednesday". Hopefully some things will work for you, and if they don't you will share your experiences and thoughts with the rest of us in the comments!
If you have any tips, techniques, tools or products that "Work for You" and you would like to share please send me an email at: tweenteenmomhairstyles@gmail.com. I would LOVE to feature your suggestions here!
Now onto what Works for Me:

To begin, I should tell you, I have a small head which makes it very hard to find sunglasses, hats and headbands that fit! But I have found a way to make those adorable fabric-style headbands work for me.
When I buy a new pack of these (usually under 5$ @ Walmart) I just throw them into the wash with my laundry. It seems the dryer causes them to shrink a little, which results in a better fit. I also find that once I have worn them a few times they tend to stretch back out. So I just wash and dry 'em again and they get nice and snug again. I think this may cause the headbands to become worn out quicker than normal, but it works for me...
Also, I don't know if anyone cares , but since my schedule has changed drastically this semester I have decided to move my hairstyle posts from Thursday to the Saturday. I think its better that way anyway, then you can spend Sunday experimenting with new ideas and go back to work/school on Monday with fun hair!
Thanks for stopping by!
02 September, 2010
Double Twisted Headband
Did you check out this hairstyle? Or this one? Well, here is a third (and last) option using those same twists.
Use them to create an all natural headband!
 After you have finished the twists and pinned them back, let your hair out of the ponytail. Curl or straighten as you wish.
 This is a great way to keep bang out of your face, and a nice alternative to the common Front French Braid headband.
Has anyone used these twists? How do you like to wear them?
Use them to create an all natural headband!


Has anyone used these twists? How do you like to wear them?
27 August, 2010
2 Twists Variations
Remember this style? Here is something else to try with the same twists.
Instead of creating a full ponytail why not leave half your hair down?
 Doing a half up-do is more casual and it also allows your to show off more of your beautiful length. You can curl or straighten the remaining hair. This option will also allow girls with shorter hair to still wear this style.
Do you prefer your hair all up? All down? Or half and half?
Instead of creating a full ponytail why not leave half your hair down?

 |
| I really like these twists! |
19 August, 2010
2 Twists into a Bun
I really love these twists and they get a lot of compliemnts (which every girl loves right?) Plus hair is more fun with some embellishments, slicked back do's are so five years ago! This style is inspired from here, I just do the twist a little differntly...
To create your twists start with an exaggerated side part:
Now you are going to section out the front bit of hair. From your part, section off the hair down to your ear. Section off enough hair to make two twists, I make each about 3/4 an inch thick, so I make 1.5 inch thick section. That all sounds really technical but just eyeball it, its hair! Tie back all the hair except your front section into a neat ponytail.
Divide your front section in half (as shown above). Clip one section out your your way while you work with the other. To start I add a little bit of pomade to the section, from root the tip. Then take a thin bit of hair by the side part, divide it in two.
 Now twist both of those strands in the same direction (I twist them to the front). You dont need to twist very much, just a few revolutions. Then cross one over the other, in the OPPOSITE dirction from your twisting (I cross towards the back). Now add hair into the front piece, twist and cross again. Repeat.
I stop adding in hair at about where the end of my eyebrow (again no science, just make it look how you like).
 Then continue make a twist down the hair (twisting front and crossing back) Add a small rubber band or clip to hold your first twist while you create the second one.
To get your twists to lay side by side when you pull them back make sure your front twist has a few more sections of hair added in (see at the top of this post if that doesnt make sense) When both of your twists are complete pull them back towards your ponytail. Secure with crossed bobby pins
 Now you can make a bun of choice. Of course I did a messy bun. Add hairspray and accessories as you please.
Do you think you will try this one? Also, I would like some feedback, is the tutorial clear? Are there too many pictures? How can I help you better?
 |
| Yes the purple flowers again... I really like them! |
 |
| the comb tail shows where I normally part |
 |
| the bobby pins are just there to show the two sections |

 |
| Adding in hair |
I stop adding in hair at about where the end of my eyebrow (again no science, just make it look how you like).

 | |
| Banding it off |

 | |
| back view |
 |
| sort of top view |
 |
| when you look like a dork, just stick a big old watermark over your face to hide it! |
17 August, 2010
New Shampoo
Let me being by saying this: I think I am in love!
I recently bought the new TRESemme Naturals shampoo and conditioner and it is seriously the greatest stuff since sliced bread! It leaves my hair so silky I am afraid that my elastics are going to just slide right out some days! For the first time in months I can actually just comb through my hair after the shower without having to add Leave-In! My hair feels so clean and bouncy. Plus its so shiny! Even the ends feel moisturized. And my curls are coming out again!
 I am not exactly sure how "natural" it really is (I still cant read half the ingredients), but I can say with confidence that the shampoo has no additional colours added because it is kind of a murky, off-white colour. Both products have a very light fruity smell that is just lovely! The conditioner leaves my hair extremely moisturized while still rinsing out easily, its great! The bottles say 'Discover 10x stronger hair after just one use.' I wouldn't say 10x, but my hair does feel stronger, maybe its just the extra moisture, but whatever it is, I am hooked!
I am really picky about my hair products but I give this one a 5/5 rating. It is affordable, cleans well, moisturizes, has a good scent, applies easily and actually does what it claims too. Seriously, try it!
Has anyone else tried this new line? What do you think? Or what is your favorite shampoo?
I recently bought the new TRESemme Naturals shampoo and conditioner and it is seriously the greatest stuff since sliced bread! It leaves my hair so silky I am afraid that my elastics are going to just slide right out some days! For the first time in months I can actually just comb through my hair after the shower without having to add Leave-In! My hair feels so clean and bouncy. Plus its so shiny! Even the ends feel moisturized. And my curls are coming out again!

I am really picky about my hair products but I give this one a 5/5 rating. It is affordable, cleans well, moisturizes, has a good scent, applies easily and actually does what it claims too. Seriously, try it!
Has anyone else tried this new line? What do you think? Or what is your favorite shampoo?
12 August, 2010
Front French Braid into Messy Bun
I don't know what it is, but I am just really into side ponytails/braids/buns this summer! Two weeks ago I showed you the Front French Braid, and here is a second day style to go along with that. (FYI: I REALLY hate taking pictures of myself...but love sharing my hair-dos)
I tend to keep the braid in over night because it keeps my hair out of my face with essentially no damage to the hair. In the morning I brush out my hair, re-do the french braid, this time adding a few more french stitches and completing the braid to the end of the hair.
Then gather all hair (braid included) into a low side ponytail. You can leave it at that if you want. But, to take it further, create a big 'ole messy bun out of that ponytail. Add an accessory of choice and hairspray of course! And you are set to enjoy yet another beautiful summer day ;) (enjoy it because its nearly over!)
As you can see I am not to concerned with this braid being neat and tight, I think it softens that look... What do you think?
What is your favorite look this summer? And how much do you hate taking pictures of yourself?
Also, wish me luck as my finals start tomorrow!
 |
| Please excuse my cranky face... |
Then gather all hair (braid included) into a low side ponytail. You can leave it at that if you want. But, to take it further, create a big 'ole messy bun out of that ponytail. Add an accessory of choice and hairspray of course! And you are set to enjoy yet another beautiful summer day ;) (enjoy it because its nearly over!)
 | |
| From the back |
 |
| Side view |
What is your favorite look this summer? And how much do you hate taking pictures of yourself?
Also, wish me luck as my finals start tomorrow!
05 August, 2010
Wrapped Side Ponytail (Bohemian look)

Make a loose side ponytail and tie it off with a thin elastic (I like the clear Goody Ouchless). Slip your ribbon or string through the back of your elastic. Then wrap it around the elastic a couple times to hide it. Then begin crossing the ribbon/string down the ponytail for a couple of inches.
You can space the crosses as close or far away as you like. At the end wrap your ribbon/string around a couple times again and tie it off. I left the tail, but you could trim them off if you prefer.

As the day went on the layers in my hair started to poke out over the ribbon some. I liked the messy look, but of you don't want that, use some product on the ponytail first to clump the hair together, then make the crosses closer together.

Do you like the Bohemian style that is popular right now? How would you describe your personal sense of style?
I would describe my style as preppy and feminine; although I do like to experiment with different looks occasionally (hence this one!)
03 August, 2010
Pigtails?
This post is inspired by something I saw last night. This lady in one of my courses was sporting a very unfortunate set of pigtails. This lady is old enough to be my mother and sports a very short curly style. Now let me start by saying, on little girls I think pigtails are THE cutest style. However, I just really don't think it is OK for women to wear pigtail.
To emphasize I tried to take a cellphone picture of this hairstyle, but I couldn't do it conspicuously. So I googled it. I couldn't find what I was looking for their either. I am not creating this post to criticise or belittle anybody! We all have our reasons for how we choose to style our hair, I just think some choices are better than others...
Let us turn to the celebrities here:
Beautiful women with beautiful hair, but is this a good choice for the red carpet??
 Absolutely adorable:
 Not so much:
 This is appropriate:
 This really, really is not:

How cute is she?
 Is this okay?
 Are braid more appropriate for older girls?
 I don't know. I just don't get it. So I turn to you guys:
Do you disagree? Do you think pigtails are appropriate on women? At what age does it become unacceptable? Please comment, I REALLY want to hear your thoughts.
just a heads up, don't google pigtails with your children in the room... (GROSS!)
To emphasize I tried to take a cellphone picture of this hairstyle, but I couldn't do it conspicuously. So I googled it. I couldn't find what I was looking for their either. I am not creating this post to criticise or belittle anybody! We all have our reasons for how we choose to style our hair, I just think some choices are better than others...
Let us turn to the celebrities here:
Beautiful women with beautiful hair, but is this a good choice for the red carpet??


Do you disagree? Do you think pigtails are appropriate on women? At what age does it become unacceptable? Please comment, I REALLY want to hear your thoughts.
just a heads up, don't google pigtails with your children in the room... (GROSS!)
01 August, 2010
Detangling Double Care Product
I was at the mall last weekend and I while perusing the drug store hair aisle I noticed that this product was on sale:
 It is called Detangling Double Care Nourish and Repair by Garnier Fructis. I have been eyeing this product for a while because I really like Fructis shampoo and conditioner, but it just looked weird so I waited. It was on sale really cheap and I was out of Leave-in so I decided to try it.
When shaken this product mixes really well (something I worried it wouldn't). It has a lovely scent, light and fruity like all the Fructis products. But despite itsclaims, 'instantly detanges hair' 'nourishes and detangles hair-without weighing it down' it really does not aid the detangling process. Sure it added a little slip to my damp hair, but I swear pure water would have the same effect. Also, my hair was more weighed down than normal.
Overall, I would give this product 1/5. It smells nice and is generally affordable, but really has no benefits at all. I won't be repurchasing (I think it was so cheap because they are discontinuing it...) and do not recommend it. I say save your three dollars, and get a spray bottle of water instead. Or suck it up and buy Infusium Leave-In Conditioner (7-8$ a bottle) because it moisturizes and helps detangling.
Has anyone else tried this product? Do you use a detangler/leave-in moisturizer? What's your favorite?
29 July, 2010
Front French Braid
Just a simple idea for today (excuse the sloppy-ness, I was in a hurry the day I took this):
 Some people call this the Lauren Conrad braid, or Braided Bangs... whatever you want to call it, I think its a really sweet style. I wear it AT LEAST once a week! It looks good on straight, wavy or curled hair. Tightening or loosening the braid also gives you variety with the style. An inside out, or dutch braid is also really nice for this style. I love this style for summer because its so laid back and easy, plus it just makes me think of the beach for some reason.
I also like this one because it looks like and works as a headband, but you don't actually have to use a headband! Because this style is so simple I didn't include a tutorial, but if anyone wants that, just leave a comment.
Does anyone else over-use this style? Or, what is your favorite simple summer style?
21 July, 2010
Wrap Around French Braid Variations 3 & 4
So remember this hairstyle? And these variations? Here are two more variations, as promised.
#3: Dress it up with a hair wrapped pony. To do this, finish your braid in a simple ponytail. Then take a sections of your longer hairs and wrap them around the ponytail. You can secure them with bobby pins after, or a clear elastic, or use a topsy tail to pull the ends back into the ponytail.
 To change this look up a little more, you can even continue a simple braid part way down the hair, then so the wrapping.
#4: Use the tail to create a messy bun:
 Here it is from the back (ish):

Remember that you can do any of these styles on wet hair for a neater, tighter look.
Has anyone tried any of these styles yet? Which variation is your favorite so far?
#3: Dress it up with a hair wrapped pony. To do this, finish your braid in a simple ponytail. Then take a sections of your longer hairs and wrap them around the ponytail. You can secure them with bobby pins after, or a clear elastic, or use a topsy tail to pull the ends back into the ponytail.

#4: Use the tail to create a messy bun:

Remember that you can do any of these styles on wet hair for a neater, tighter look.
Has anyone tried any of these styles yet? Which variation is your favorite so far?
18 July, 2010
Look What I Made!!


Take that 6 inch piece and use a glue gun to make it into a loop. Then , using more glue, press your loop in half, creating an 8 shape.


You are done the main part of your bow.
Next step is to take the largest piece you cut and make a loop with it. Then flatten that loop like you did with the first one. You do not need to squish this on together though. Here is what you should have now: (only your second loop will be slightly smaller than mine!!)

 Glue your bow on top of your larger loop. It is up to you as to which side of the bow you face up. I like the folded side up, but the creased side is cute too.(excuse the blurry photo, my camera has a mind of its own)
Now take your small piece of ribbon and glue it to the back of your two layer bow. It will form a T like shown:

Wrap that ribbon around twice to cover the front.

If you want this attached to a fourth piece of ribbon, to create the headband like I did, in your second wrap, take the middle ribbon over the headband ribbon as well (not shown here), this will keep your bow in place. Glue your anchor piece on the back. If you want to attack this bow to a plastic headband, ponytail holder, or a clip of some kind, just do the two wraps and glue it in the back. You will have this:

Cute right? You can use hot glue to attach it to the accessory of your choice.

And here is me, sporting my new headband! I love it!
Subscribe to:
Posts (Atom)